17.09.2016difficulty level - Q
How to Bake a Quantum Cookie

by Madelaine Liddy
Sweet Grandmother’s Spatula! After pulling out your fresh cookies from the oven and taking your first taste you notice that in creating your cookie dough, you accidentally mixed up the sugar and salt. Now your dreams of enjoying that oh so sweet sugar cookie have been dashed away and you are left with a confectionary calamity. However, all is not lost…. your seemingly imperfect dough with salty defects can be fixed to result in the masterpiece of baked goods. Thus I present to you, the challenge of baking the chocolate chip and sea salt cookie. When balanced correctly, these two flavours can enhance each other to create complex layers of pure deliciousness.
Now you may be asking yourself, what does this have to do with quantum mechanics? Picture your salty cookie, full of defects within its dough, seemingly useless. However, if you add the right amount of chocolate chips in places as accurately as possible, you will achieve the right balance of flavour and achieve the perfect chocolate chip and sea salt cookie, a true baking delicacy. Likewise, in experiment, we begin with a crystal that contains lattice defects with quantum properties. In the general scheme of things, the goal is to add other materials within or near the substrate in as precise a location and concentration as possible so that we may enhance, control and measure these defects.
So with that in mind… let’s get baking!
- What kind of cookie do we have?
You begin with your ‘substrate’. This is the base material you will be experimenting on. Before doing any sort of processing on your substrate, you should ask yourself a couple of questions. What am I trying to enhance here? Why am I interested in this material? Is it conductive? Is it resistant to heat?
Likewise with our salted cookie. The density, heat resistance and brittleness are all things we have to consider here as well. Lets say that we are dealing with a standard, soft bake cookie. We are able to cut into it with a knife with some force and it will still hold its shape. It is resistant enough to heat that we are able to pour melted chocolate into it, so it won’t melt. For comparison, if our cookie was made of ice cream, then pouring something hot onto it would just cause the whole thing to melt. Likewise, if it was too crumbly, then we wouldn’t be able to carve it without it crumbling into a million pieces.
![No-one likes a salty cookie]()
- How do we control the position of our chocolate chips?
Now that we have evaluated the physical parameters and abilities of our substrate, we want to create our mask. The mask will determine where our material will be deposited within our substrate. To do this, we begin by applying a thick organic material called a polymer layer on top of the substrate. To apply this material, we complete a process called spinning, where we drip the liquid polymer onto the surface of our substrate, then spin the substrate at a few thousand revolutions per minute, which causes our liquid spread out into an even, solid layer.![A polymer covered cookie. Not tasty.]() After spinning, we expose the polymer layer to light or electrons. In this case, the finer the features we want, the smaller the wavelength of radiation we need to expose the polymer to. So for very fine features, we want to use electrons. Once exposed, we then develop. The areas that have been exposed will wash away when put in a developer, exactly the same as what happens when you develop a photograph. What’s left is a stencil on top of the substrate where some areas of the substrate are protected by this polymer layer and some other areas of the surface are exposed to the elements.
After spinning, we expose the polymer layer to light or electrons. In this case, the finer the features we want, the smaller the wavelength of radiation we need to expose the polymer to. So for very fine features, we want to use electrons. Once exposed, we then develop. The areas that have been exposed will wash away when put in a developer, exactly the same as what happens when you develop a photograph. What’s left is a stencil on top of the substrate where some areas of the substrate are protected by this polymer layer and some other areas of the surface are exposed to the elements.
![Highly charged baking!]() In the cookie case, the stencil will control where the chocolate chips are deposited in the cookie. Take your cookie and place a metal sheet on top of it. Cut the metal sheet so that the profile perfectly matches that of the cookie. Cut out holes in all the places that you want your chocolate chips to go on the cookie. Now, if we were to just pour the melted chocolate onto the cookie right now, we would end up with chocolate sticking out from the surface of the cookie. Sure, we’d be close to the salt in terms of the radial direction, but we would have a layer of sweet, and a layer of salty. For our cookie, we want the sweet and salt to blend together in one layer. This is where etching comes in!
In the cookie case, the stencil will control where the chocolate chips are deposited in the cookie. Take your cookie and place a metal sheet on top of it. Cut the metal sheet so that the profile perfectly matches that of the cookie. Cut out holes in all the places that you want your chocolate chips to go on the cookie. Now, if we were to just pour the melted chocolate onto the cookie right now, we would end up with chocolate sticking out from the surface of the cookie. Sure, we’d be close to the salt in terms of the radial direction, but we would have a layer of sweet, and a layer of salty. For our cookie, we want the sweet and salt to blend together in one layer. This is where etching comes in!
![This is definitely the most difficult way to make a chocolate chip cookie]()
- How do we control the depth of our chocolate chips?
Etching can be done in two ways. The first is a wet chemical etch and the second a dry physical etch. In the chemical etch, you completely submerge your substrate in a solution, and the parts that are exposed begin to react with the solution. When you remove it, all the parts that were protected by the mask are safe, but the parts that were exposed are chemically removed. In the dry etching case, you bombard the entire surface in one direction with molecules and essentially they dig into the substrate. This is a more directional process than the wet chemical case.
The choice of wet or dry etching has a lot to do with the substrate material. You can imagine that putting your cookie in milk, like a wet etch, would definitely expose the areas that you want, but would most likely just dissolve the entire cookie away and you would be left with nothing but the cookie cutter. So in our case, we want to use a dry physical etch to dig our holes while leaving the rest of the cookie untouched. Instead of bombarding it with atoms, we are going to use a knife. Using the stencil as a guide, we dig into the cookie at the desired depth leaving holes. Just like with fabrication, the smoother you want your holes to be or the finer features you have, the smaller the ‘knife’ you need. If your cookie is a denser cookie, you need to use a sharper knife. Once the holes are dug, you can now place the chocolate chips exactly where you want!
![Now all we need to do is deposit that delicious chocolate]()
- What’s the best way to add the chocolate?|
Your etched cookie is ready for the chocolate chips now. To do this, we take a solid chunk of chocolate, heat it up and melt it so it’s nice and sticky, and pour it over the entire cookie. Luckily, since we have the stencil and have dug into the cookie, the chocolate will only land, cool and harden in the spots that are exposed. The rest of the chocolate just sits on top of the stencil.
![This might seem like a waste of chocolate, but it is the best way to make our cookie]() Similarly to our substrate that has now been etched, we can use techniques like evaporation or sputtering to heat up the metals and direct them towards the substrate. The areas that have been exposed will have metals deposited into them while the rest will stick to the mask.
Similarly to our substrate that has now been etched, we can use techniques like evaporation or sputtering to heat up the metals and direct them towards the substrate. The areas that have been exposed will have metals deposited into them while the rest will stick to the mask. - How do we get the final product?
The final step now is to remove the mask so you’re left with nothing but your substrate and deposited metals. To do this, you can use a lift off process. In this case, you put the substrate into a solution that dissolves the mask, but not the substrate or the metals. Once dissolved, you are left with a substrate with materials deposited at the right depth and position.
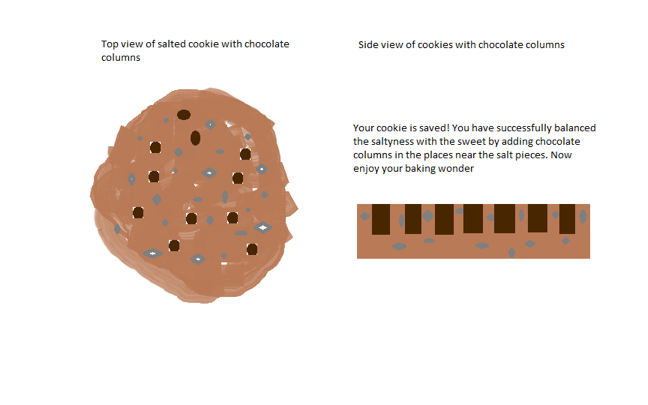
For our cookie, since most things will dissolve it, we are going to use a different strategy. In our case, we’re just going to remove the cookie cutter away to leave the holes of chocolately goodness uniformly dispersed in our salted cookie. You now have before you, the perfect sea salted and chocolate cookie. Mmmmm delicious.
![It just takes a few years of nanofabrication experience]()

 After spinning, we expose the polymer layer to light or electrons. In this case, the finer the features we want, the smaller the wavelength of radiation we need to expose the polymer to. So for very fine features, we want to use electrons. Once exposed, we then develop. The areas that have been exposed will wash away when put in a developer, exactly the same as what happens when you develop a photograph. What’s left is a stencil on top of the substrate where some areas of the substrate are protected by this polymer layer and some other areas of the surface are exposed to the elements.
 In the cookie case, the stencil will control where the chocolate chips are deposited in the cookie. Take your cookie and place a metal sheet on top of it. Cut the metal sheet so that the profile perfectly matches that of the cookie. Cut out holes in all the places that you want your chocolate chips to go on the cookie. Now, if we were to just pour the melted chocolate onto the cookie right now, we would end up with chocolate sticking out from the surface of the cookie. Sure, we’d be close to the salt in terms of the radial direction, but we would have a layer of sweet, and a layer of salty. For our cookie, we want the sweet and salt to blend together in one layer. This is where etching comes in!

 Similarly to our substrate that has now been etched, we can use techniques like evaporation or sputtering to heat up the metals and direct them towards the substrate. The areas that have been exposed will have metals deposited into them while the rest will stick to the mask.
Now, of course there are exceptions to this recipe and parts I’ve glazed over. In both cases you can begin with an array of different materials…cookie, ice cream, fruit, veggies, you name it! The goals can also differ every time you begin your process. Some times you want a chilled dessert to cleanse the pallet, other times you want a decadent seven tiered cake. The process of achieving this can be different every time.
Just remember that whether you’re stepping into the cleanroom or the kitchen, both baking and fabrication require patience, time management, creativity, organization and most importantly, a recipe.
Our job as fabricators is to pick the right moulds, the best icing and flavour combinations to enhance these features, to make the sweetness stand out at just the right amount, or to give the perfect texture. If we do our jobs right, the proof of our quantum phenomenon, will be in the pudding.
A little about me!
 Hello everyone and welcome once again to another edition of the QuTech blog! My name is Madelaine, I am a visiting PhD student from the University of Waterloo in Ontario, Canada. For my time at TU Delft, I am a member of Team Diamond, Prof. Ronald Hanson’s group.
When I’m not in the cleanroom, I enjoy to have sing offs with myself, going outside and exploring, and trying new foods and trying to recreate them myself at a later time. While growing up, cooking and sharing meals was an important part of keeping a busy household together. It was the one time of day where all six of my family members could sit down together and talk about their days. Even now, whenever we get together, much of my time spent with my family revolves around the kitchen! I have always loved meal time, eating and discovering new flavours. However, I didn’t always like to be the one doing the actual cooking. No… I am notorious for starting to bake something before checking to see if we have all the ingredients, turning the temperature of the oven up to speed up the baking process, trying to make fluffy cinnamon buns with almond flour forgetting that it doesn’t rise, trying to water down whole fat milk with water to achieve half fat milk, and my personal favourite, leaving popcorn sitting in a pot with oil on the stove to cook and promptly forgetting about it while watching the battle of Helms Deep only to come back to the sweet sounds of the fire alarm and a lovely grease fire.
For me, this started to make a turn when I began an internship during my undergraduate degree doing diamond fabrication. After a couple months of work in the cleanroom I started to notice something….my cooking became a lot better. Measuring accurately, understanding the roles of ingredients, multitasking, knowing when to stick to a recipe and when you can be creative, and most importantly, staying focused all started to become something fun rather than tasking. After speaking with a few of my colleagues here at TU Delft, they noticed that they found the same things as well. Thus began the inspiration for this blog post!
Now, full disclaimer, I am about as close to being a restaurant quality chef as I am to graduating, so take the accuracies in the article with a grain of salt, but I had fun drawing parallels between two interests of mine and I hope you have enjoyed reading it!